Showing posts with label Tutorials. Show all posts

Wednesday, November 7, 2012

Rapunzel Pinata Tutorial (Ribbon Pull)


Last year we discovered the ribbon pull pinatas. (I don't know the official name for these, but that's what I call them.) The first one we used I bought at Target on sale. We simply don't have a place to hang a traditional pinata and I think our kids are too small to be swinging around a bat in a circle of people.
The way you play is each kid takes turns pulling a ribbon. All but one will pop off easily. Whoever pulls the ribbon attached to the trap door will open up the pinata and let all the candy out. Simple, easy, and SAFE!
Here's how I made our Rapunzel Ribbon Pull Pinata (inspired by a traditional pinata on this blog ).


Wednesday, August 1, 2012

Inexpensive Hand-Tied Wedding Bouquet {DIY}


A friend of mine was recently married, but being the talented makeup artist that she is, she did everyone's makeup and ran out of time for her photographer to take bridal portraits. So I recommended my husband take post-wedding pictures of the two of them. This turned out to be such a fun solution to a very common problem. So many weddings are rushed and there is often little time to shoot those crazy romantic and fun portraits of the special couple.
The night of our shoot she did her makeup,  had her hair done up all over again, he rented a tux, and I made up this sweet little bouquet for her to carry. Everyone knows Trader Joe's has fabulous, inexpensive flowers, so I just picked up $10 purple flowers with red roses and whipped up a simple hand-tied bouquet. If you've never made one, give it a try. They are so beautiful and easy to make.

How To Make A Hand-Tied Bride Or Bridesmaid Bouquet

1.  Start by gathering up the flowers in your hand one stem at a time. Be sure to alternate the different colors so all the flowers are evenly dispersed throughout. Since roses were the fanciest flower in this bouquet, I made sure they didn't get lost among the others. As you gather all the flowers together try to create a dome shape. Use stronger stems around the outside perimeter to give strength to the overall design.

2. Take a skinny rubber band, wrap it around the middle of the flower stems and tie it in a knot. If you use a really thick rubber band you will end up with a lumpy "handle".

3. Trim all the stems to an even length.

4. Wrap green florist tape around the stems, covering up the rubber band and extending down the length of the stems a couple inches.

5. Use wide ribbon to cover up the florist tape. Tie a knot or bow and use hot glue to tack the ribbon in place wherever you see a weak spot which may slip. 

You can buy all kinds of gorgeous ornaments to cover the stems at craft stores. For our purposes, we kept it simple with purple ribbon.

Flowers are beautiful, but the bride and groom will always be the shinning stars in a wedding.

Saturday, April 7, 2012

Feather Headband Tutorial

It's been a long time since I've done anything crafty so I made a point to make SOMETHING for my daughters Easter outfit. Joann's finally has this really fun netting and I bought a couple yards just to have on hand a few months ago. Everything else was already in my craft stash so I  used whatever looked appealing to me and hot glued it all together. I hope you like it!


I hope you all have a blessed Easter!

Saturday, August 20, 2011

Playing With Mirrors and Vibrance

The other day, I decided to take photos of my niece on our massive mirror. I'm not a skilled photographer like my hubby, but I still think they turned out pretty cute.


Here's how I bumped up the "vibrance" in the pictures.

1. Open your picture in Photoshop
2.Go to "Image"
3. Select "Adjustments"
4. Click on "Vibrance"
5. Adjust your "Vibrance" and "Saturation" until you like how it looks.

That's it! Now you can turn a not so great image into something pretty cool!
   
A little dull... to FUN!


Friday, July 29, 2011

Frayed Rosette Headband Tutorial

Here's my Frayed Rosette Headband Tutorial in case 
you missed it on Ucreate:

Make sure all your strips are cut on the bias (cut your fabric on an angle so the threads in the fabric are running on the diagonal). This way you don't have threads shedding off your headband.


Cut one strip of fabric 2" X 9"
Cut two strips of fabric 1-1/2"  X 9"
Cut two more strips as long as you can make them 1" wide to wrap your headband with.


Step One: Take the widest strip and fold in half lengthwise about 3/4 of the way as in the picture.


Step Two: Sew along the long folded edge and pull the stitching to gather it.


Step Three: Sew the short ends together so you have a ring.


Step Four: Squash the circle a little to make an oval and sew the middle together on the backside so it stays an oval shape.


Step Five: Repeat steps 1-4 on the 1-1/2 " strips.

Now you should have three ovals that look like this.

Step Six: Fray the edges of the ovals by pulling on the fabric with your fingers.


Step Seven: Fray one side of your long 1" strips. Then simply wrap your headband in the strips of fabric pulling the fabric a little so it forms to the arch of the band. Wrap the fabric at a slight angle and overlap just a little as you go. I put a dab of hot glue on the underside of the headband with each wrap of fabric.  If you need two strips to completely cover the headband, place your "seam" on the top where you'll be gluing your rosettes.


Step Eight: Hot glue the ovals onto your headband and if you'd like add a button, rhinestones, or a vintage earring like I did.

Monday, July 25, 2011

Child Haircut Tutorial

     Cutting kid's hair is sooooooo tricky. First of all, they wiggle. Second, their hair is weird. Seriously, it is very different from adults. Especially blondes. You can see chop marks very easily. It is a complete waste of time to try to do a slick Sassoon blunt cut on a child. I've seen someone do a precision cut on a child once and while they were sitting it looked flawless. As soon as that little girl stood up, the whole cut went wonky and choppy. It was very strange. So I've developed my own strategy to deal with the fine, mysterious hair of children and I'm really excited to show you how!
     My model is one of the most well behaved three year old's I know. Yet even still, she wiggled and wanted to play with her cousins instead of get a haircut.


Start by sectioning the hair into quarters. Part from behind ear to ear and front to back down the middle.


Now take a horizontal slice along the bottom on one side. This will be your first section. Hold the hair as close to the child's body as possible. (Wiggly kid  = crooked lines. Just do the best you can)
 Now here's the secret...


     Don't cut straight across. Using the tips of your scissors, nip into the hair creating a notched line along the bottom at your desired length. Keep your notches narrow. This is called "point cutting". You will create a soft, diffused edge that won't look choppy. Just don't cut your fingers!

     Once this first section is cut, consider it your guide. Your guide will show you how long to cut the rest of the hair on this area of the head. Proceed to let down 1/2" to 1" horizontal sections of hair depending on the thickness of the hair. You want to still be able to see your guide through the next portion of hair so you have a reference for length and all the hair will be evenly cut. Continue to hold the hair close to the body as you cut.


Cut the entire backside of the head this way.


     My model didn't have much hair on the sides of her head, so I let it down all at once and used the back as a length guide to cut across. If the child your working on has thick hair, let down small horizontal sections like the back and just point cut the entire side the same way.
Now for some simple layers...


Take a narrow rectangular section on the very top of the head. This will be your guide for all the layers.


Lift it up straight in the air and point cut across to the desired length.


Using that center section as a guide, take  1" sections of hair perpendicular to the center part, lift straight up into the air and point cut across the top. Do this to hair on either side of your guide and any other hair on the back/top of the head.

You're pretty much done. You can point cut the bangs as well if you'd like.


I hope this helps you out! Just remember, point cutting is the secret!

Saturday, July 23, 2011

Flower Ballerina Headband


In case you missed this on Me Sew Crazy, here's my latest headband tutorial:

When I was a little girl my mom would take me to see The Nutcracker ballet. My favorite costumes were those worn during The Waltz Of The Flowers. Those beautiful flower tutus were the inspiration for this headband.


Start by taking apart your flowers and throwing away the hard plastic pieces. Then apply a thin line of glue around the edges and dipping them into the glitter.


Once the glitter is dry, put your flowers back together again and hot glue some gems in the center.


Hot glue your trim along the top of you headband.


Sew down the middle of each tulle strip lengthwise. Pull to gather and wrap the thread around the middle several times before knotting.


Hot glue your two "tutus" a little off to the side of the headband.


Hot glue your flowers and leaves on top of the tulle.
Your headband is now ready for a sweet little ballerina!


Wednesday, July 20, 2011

EASY Barbie Dress Tutorial

A few weeks ago, my daughter asked me to make Barbie clothes and I immediately said, "NO WAY!" All those tiny seams and closures....forget it!
Then my three year old had the genius suggestion of "just don't put on any straps". That got me thinking...tube dress...knit jersey....we have some reject shirts in the garage....I think I could put something together! And so I came up with this -

To start, you'll need an old T-shirt you don't want any more, or some jersey knit you've purchased. Then cut it up into the following pieces:

Bodice  4"X5"
Skirt 3 1/4" X 15"

You'll also need 1/4" elastic cut into 2 pieces.
One should be 4" and the other 3"

Step One:
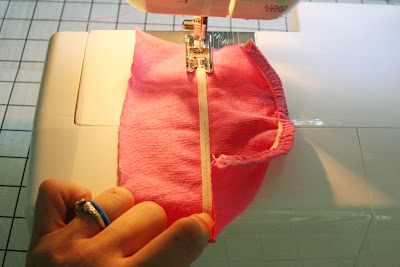
Sew the 4" elastic along the long side of your bodice piece. Fold over the fabric edge onto the elastic and zigzag it stretching it just a tad as you sew.

Step Two:
Now take your 3" piece of elastic and sew it down the middle of your bodice piece. This time you will REALLY need to stretch the elastic as you sew so it is stitched all the way across your fabric. Zigzag once again.

 Step Three:
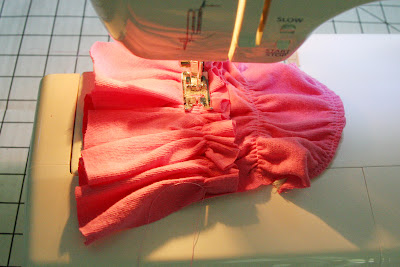
Take your long skirt piece and stitch across the long edge to gather.

Step Four:
Pull the gathers to fit along the bottom of your bodice. Sew the skirt onto the bodice trying to stitch directly on top of your gathering stitches. I zigzagged this as well.

Your dress so look something like this now:

Step Five:
Fold it in half with the right sides together and straight stitch a narrow seam down the back.

Step Six:
Flip it right side out and embellish with bows or whatever else your heart desires!

Maybe making Barbie clothes isn't so tricky after all!